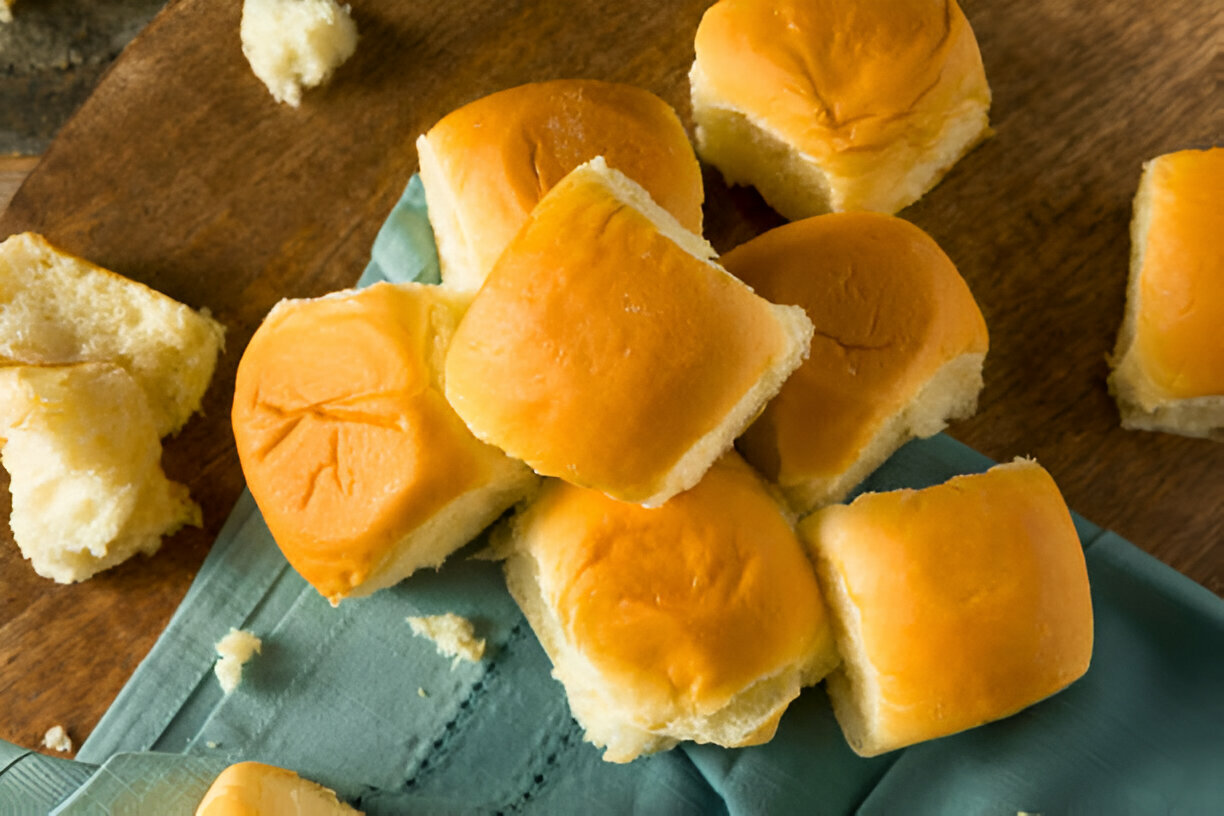
The aroma of fresh-baked dinner rolls wafting through your kitchen is a comfort that few things can match. Imagine gathering around the dinner table, breaking bread, and sharing stories with loved ones, all while warm, fluffy rolls complement your favorite dishes. Homemade dinner rolls are not just a side dish; they are an experience, a tradition passed down through generations, and an invitation to indulge in comfort food at its best.
Why are homemade rolls a fantastic addition to any meal? For starters, they elevate the dining experience, making even the simplest meals feel special. Unlike store-bought alternatives, homemade rolls provide unparalleled freshness and flavor, allowing you to connect with the ingredients and the process. Plus, making them from scratch gives you complete control over the ingredients, ensuring your rolls are crafted with love and without preservatives or unwanted additives.
In this comprehensive guide, readers can expect to find everything they need to know about making easy homemade dinner rolls. We’ll cover the benefits of opting for homemade over store-bought, explore necessary ingredients and equipment, provide a step-by-step recipe, and share tips for perfecting your rolls. Additionally, we’ll delve into variations, storage solutions, and creative serving suggestions, ensuring that your dinner rolls become a beloved staple on your table. Whether you’re an experienced baker or a novice, this guide will empower you to create delicious rolls that will impress your family and friends.

Benefits of Making Homemade Dinner Rolls
When it comes to enhancing your meals, few things can compare to the advantages of making homemade dinner rolls. Opting for homemade will not only elevate your dining experience but significantly improve the flavor and quality of your rolls. Here are some compelling reasons to choose homemade dinner rolls:
Why Choose Homemade?
- Freshness: Homemade rolls are made with fresh ingredients, providing a soft and fluffy texture that store-bought options simply cannot match. The moment you pull them out of the oven, the warm aroma envelops your kitchen, enticing everyone to gather around the table.
- Nutritious Ingredients: By making your rolls, you have complete control over what goes into them. This means you can select high-quality ingredients, avoiding preservatives and artificial additives often found in commercial products. Your homemade rolls can be as wholesome as you desire.
- Customization: Making dinner rolls at home allows you to tailor them to your taste preferences or dietary needs. Whether you prefer whole wheat, gluten-free, or want to add herbs and spices, the possibilities are endless.
Cost-Effectiveness
Homemade dinner rolls can also be a more economical option. By using basic pantry staples, you can create a delicious side that costs significantly less than store-bought alternatives. Ingredients like flour, yeast, and milk are often items you already have on hand, making it easy to whip up a batch of rolls on a whim. Baking at home not only saves you money but also allows you to enjoy the process of creating something special for your meal.
Ingredients for Easy Homemade Dinner Rolls
To create the perfect batch of homemade dinner rolls, you'll need a few key ingredients. Here’s a breakdown of what you'll need:
- Bread Flour: Acts as the foundation of your rolls, providing structure and chewiness.
- Yeast: Active dry yeast is typically recommended for its reliable fermentation capabilities.
- Sugar: A small amount of sugar helps to activate the yeast and adds a hint of sweetness to the rolls.
- Salt: Enhances flavor and strengthens gluten structure, vital for achieving the right texture.
- Milk: Warm milk helps to nourish the yeast and contributes to the dough’s richness.
- Butter: Adds flavor and a tender crumb to the rolls.
- Eggs: Incorporating eggs adds richness and helps bind the ingredients together.
When sourcing your ingredients, try to select high-quality options. Freshness matters, especially with yeast and flour. Look for products that have a good shelf life, and consider visiting local markets for organic or freshly milled options. Using quality ingredients will make a noticeable difference in the taste and texture of your rolls, ensuring they are a hit with family and friends.

Equipment Needed
To create those perfect homemade dinner rolls, you’ll need a few essential pieces of equipment. Having the right tools can make the baking process smoother and more enjoyable. Here’s what you’ll need:
- Mixing Bowl: A large mixing bowl is essential for combining your ingredients.
- Measuring Cups and Spoons: Accurate measurements are crucial for baking, so have a set of measuring cups and spoons handy.
- Dough Scraper: This tool helps you knead and manipulate the dough easily.
- Baking Sheet: A flat baking sheet will be needed for placing the shaped rolls as they rise and bake.
- Kitchen Towel or Plastic Wrap: To cover the dough during rising, you’ll need something to keep the moisture in.
Step-by-Step Recipe for Easy Homemade Dinner Rolls
Preparation Time
15 minutes (Not including rising time)
Cooking Time
15-20 minutes
Total Time
Approximately 2 hours (including rising time)
Detailed Ingredients List
For the Dough:
- 4 cups all-purpose flour
- 2 ¼ teaspoons active dry yeast
- 1 tablespoon sugar
- 1 teaspoon salt
- 1 cup whole milk, warmed
- ¼ cup butter, melted
- 2 large eggs
For the Topping:
- 2 tablespoons melted butter for brushing.
Directions
- Activate the Yeast: In a small bowl, combine warm milk and sugar, stirring until dissolved. Sprinkle the yeast on top and let it sit for 5-10 minutes until it becomes frothy.
- Mixing the Dough: In a large mixing bowl, combine the flour and salt. Add the activated yeast mixture, melted butter, and eggs. Mix the ingredients until they form a soft dough.
- Kneading: On a lightly floured surface, knead the dough for about 8-10 minutes until it is smooth and elastic. This step is essential for gluten development.
- First Rise: Place the dough in a greased bowl, cover it with a kitchen towel, and let it rise in a warm environment for about 1 hour or until it has doubled in size.
- Shaping the Rolls: After the dough has risen, punch it down gently to release the air. Divide the dough into 12 equal pieces and shape each piece into a ball. Place them on a greased baking sheet.
- Second Rise: Cover the shaped rolls with a towel and let them rise again for about 30-45 minutes, or until they have doubled in size.
- Baking: Preheat your oven to 375°F (190°C). Bake the rolls for 15-20 minutes or until they are golden brown on top.
- Cooling: Remove the rolls from the oven and transfer them to a wire rack to cool slightly.
- Brushing with Butter: For added flavor, brush the warm rolls with melted butter immediately after removing them from the oven.
Tips for Perfect Dinner Rolls
- Dough Consistency: The dough should be soft but not sticky. If it's too sticky, add a little more flour. If it's too dry, add a bit of water or milk.
- Rising Environment: Creating a warm space for the dough to rise is crucial. You can place it in a slightly warm oven or cover it with a warm towel.
- Avoiding Overbaking: Keep an eye on your rolls as they bake. They should be golden brown on top, and you can check for doneness by tapping the bottom; if it sounds hollow, they’re ready.
Variations on Dinner Rolls
Herb and Garlic Rolls
Incorporate minced garlic and fresh herbs into your dough for a flavorful twist. Simply add these ingredients while mixing the dough to achieve delicious Herb and Garlic Rolls.
Whole Wheat Dinner Rolls
By substituting half or all of the white flour for whole wheat flour, you can create a healthier variant. The nuttier flavor of whole wheat adds a unique touch to your rolls.
Sweet Dinner Rolls
Add cinnamon and sugar to the dough for a delightful sweet variation. A sprinkling of sugar on top before baking gives them a beautiful, sweet glaze.
Storing and Freezing Homemade Dinner Rolls
Storing: To keep your rolls fresh for a few days, store them in an airtight container at room temperature. If you want to keep them longer, consider freezing.
Freezing Instructions: Allow the rolls to cool completely, then place them in a freezer bag or container. When ready to eat, simply thaw the rolls overnight in the refrigerator and warm them in the oven before serving.
Serving Suggestions
Homemade dinner rolls are versatile and can be paired with various dishes. Try serving them alongside soups and salads for a complete meal. They also work wonderfully as sliders or sandwich bases, making them perfect for gatherings. For dinner parties, consider presenting the rolls in a bread basket lined with a cloth for a charming touch.
FAQ Section
Can I use instant yeast?
Yes, you can use instant yeast instead of active dry yeast. The primary difference is that instant yeast doesn’t need to be activated in warm water and can be mixed directly into the flour.
Why are my dinner rolls dense?
Dense rolls can result from various factors, including not allowing the dough to rise sufficiently or using expired yeast. Ensure your yeast is fresh and give the dough plenty of time to rise.
How can I make my rolls fluffier?
Incorporating air during kneading is key. Make sure you knead the dough adequately to develop gluten, which helps achieve a light and airy texture.
Can I make the dough ahead of time?
Yes, you can prepare the dough in advance. Refrigerate the kneaded dough overnight, allowing it to rise slowly. You can also freeze the shaped rolls before the second rise for convenience.
Conclusion
Making dinner rolls from scratch is a joyful and rewarding experience. With this guide, you're now equipped to create soft, fluffy rolls that your family and friends will love. Embrace the process, experiment with variations, and enjoy the delightful aroma filling your kitchen. Happy baking!

Easy Homemade Dinner Rolls
Equipment
- 1 large mixing bowl
- 1 measuring cups and spoons
- 1 wooden spoon or spatula
- 1 baking sheet
- 1 clean kitchen towel
- 1 oven
Ingredients
- 4 cups all-purpose flour
- 1 packet (2 ¼ teaspoons) active dry yeast
- 1 cup warm water About 110°F/43°C
- ¼ cup granulated sugar
- ¼ cup unsalted butter, melted
- 1 teaspoon salt
- 1 large egg
Instructions
- In a large mixing bowl, dissolve the active dry yeast and sugar in warm water. Let it sit for about 5-10 minutes until it becomes frothy.
- Add the melted butter, salt, and egg to the yeast mixture and stir well.
- Gradually add the flour to the mixture, one cup at a time, stirring until the dough starts to come together.
- Once the dough is formed, turn it out onto a floured surface and knead for about 5-7 minutes until smooth and elastic.
- Place the dough in a greased bowl, cover it with a clean kitchen towel, and let it rise in a warm place for about 1 hour or until it has doubled in size.
- Preheat your oven to 375°F (190°C).
- Once the dough has risen, punch it down and divide it into 12 equal pieces. Shape each piece into a ball and arrange them in rows on a greased baking sheet.
- Cover the rolls with the kitchen towel again and let them rise for another 30 minutes.
- Bake the rolls in the preheated oven for 20 minutes, or until they are golden brown.
- Remove from the oven and let cool slightly before serving.