
The Best Dinner Rolls – Kristine’s Kitchen Recipe Guide
When it comes to creating the perfect meal, few things can elevate a dining experience quite like a basket of warm, freshly baked dinner rolls. In this article, we embark on a delightful journey to discover the best dinner rolls, focusing on the recipes that will have your family and guests clamoring for seconds. At Kristine’s Kitchen, we believe that homemade rolls are not just a side dish; they are a labor of love that brings people together around the table, filling the air with warmth and the aroma of freshly baked bread.
Homemade dinner rolls offer numerous benefits over their store-bought counterparts. Not only do they bring unmatched freshness and flavor, but they also provide an opportunity to infuse your personality and creativity into the kitchen. Imagine the joy of serving rolls that are soft, fluffy, and warm, perfectly complemented with butter or enjoyed alongside your favorite soup and salad. In this article, we will explore the significance of dinner rolls in our culinary traditions, share a variety of types that you can easily make at home, and, of course, present Kristine’s Kitchen’s treasured dinner roll recipe that is sure to impress. So, let’s get ready to roll!

Why Dinner Rolls Are Essential
Dinner rolls are more than just carbohydrates on a plate; they are a universal symbol of hospitality and togetherness across various cultures. From the fluffy white buns served at American Thanksgiving feasts to the traditional naan found at Indian family gatherings, these little breads play a significant role in our culinary traditions. They are often the first item to disappear from the table, eagerly consumed by family and friends, representing warmth and comfort in every bite.
During special occasions and family gatherings, dinner rolls have the unique power to bring people together. Their presence transcends the meal itself; they evoke memories of laughter, stories shared, and moments cherished. Homemade dinner rolls, in particular, have a way of creating a more intimate dining experience, inviting everyone to savor not only the food but also the love and effort invested in making them. Unlike store-bought options, homemade rolls provide a freshness and flavor that can rarely be matched. The process of mixing, kneading, and baking gives the cook a chance to express their creativity and set the atmosphere for the meal.
Ultimately, while any meal can benefit from a side of rolls, homemade dinner rolls stand out as a labor of love. They encapsulate the spirit of cooking—nurturing not just the body but also the soul. With this appreciation for dinner rolls in mind, it’s time to explore the different types you can make at home!
Types of Dinner Rolls
When it comes to dinner rolls, there’s a wide spectrum of styles, each with its unique characteristics and backstories. Whether you prefer the classic or want to experiment with flavors, here are some popular varieties that will make your meals memorable.
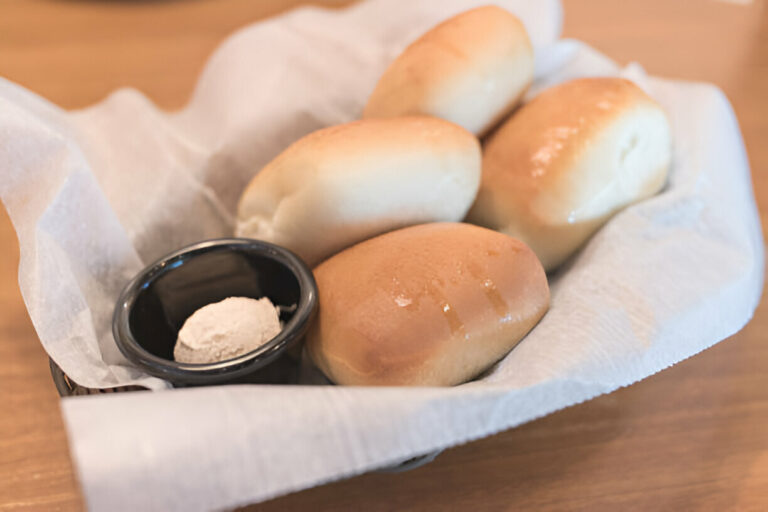
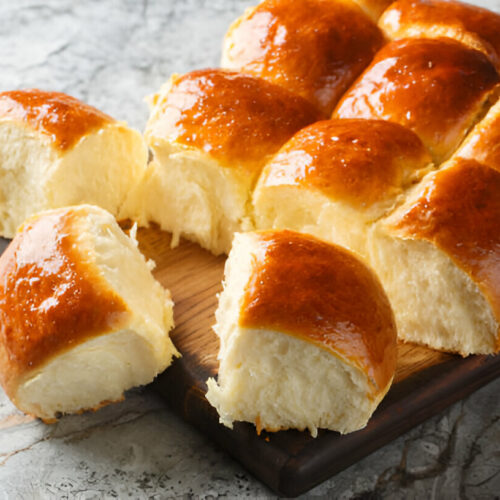
- Traditional Dinner Rolls: Soft, fluffy, and slightly sweet, traditional dinner rolls are the quintessential complement to any meal. With a light golden crust and a tender interior, these rolls are perfect for slathering with butter or mopping up gravy.
- Herb and Cheese Rolls: For those seeking a gourmet twist, herb and cheese rolls incorporate flavors from fresh herbs and rich cheeses. These rolls add culinary flair, elevating a simple dinner to a fine dining experience. Imagine bites infused with rosemary, garlic, or cheddar, making them irresistible.
- Sweet Dinner Rolls: Perfect for special occasions, sweet dinner rolls often feature enrichments like cinnamon, sugar, or fruit. They can even double as a dessert, offering a delightful twist that adds a sweet note to your meal.
- Whole Wheat and Healthier Options: With an increasing focus on healthy eating, many are turning to whole wheat or alternative grain rolls. These options provide a nutty flavor and added fiber, catering to those seeking nutritious substitutes without sacrificing on taste.
Each variety of dinner roll brings its own charm to the table, making them essential not just as food, but as an experience that fosters connection and joy during mealtime.

Types of Dinner Rolls
When it comes to dinner rolls, there’s a wide spectrum of styles, each with its unique characteristics and backstories. Whether you prefer the classic or want to experiment with flavors, here are some popular varieties that will make your meals memorable.
- Traditional Dinner Rolls: Soft, fluffy, and slightly sweet, traditional dinner rolls are the quintessential complement to any meal. With a light golden crust and a tender interior, these rolls are perfect for slathering with butter or mopping up gravy.
- Herb and Cheese Rolls: For those seeking a gourmet twist, herb and cheese rolls incorporate flavors from fresh herbs and rich cheeses. These rolls add culinary flair, elevating a simple dinner to a fine dining experience. Imagine bites infused with rosemary, garlic, or cheddar, making them irresistible.
- Sweet Dinner Rolls: Perfect for special occasions, sweet dinner rolls often feature enrichments like cinnamon, sugar, or fruit. They can even double as a dessert, offering a delightful twist that adds a sweet note to your meal.
- Whole Wheat and Healthier Options: With an increasing focus on healthy eating, many are turning to whole wheat or alternative grain rolls. These options provide a nutty flavor and added fiber, catering to those seeking nutritious substitutes without sacrificing on taste.
Each variety of dinner roll brings its own charm to the table, making them essential not just as food, but as an experience that fosters connection and joy during mealtime.
Kristine’s Kitchen’s Best Dinner Rolls Recipe
Ingredients
- 4 cups all-purpose flour
- 1 packet (2 ¼ teaspoons) active dry yeast
- 1 ½ teaspoons salt
- ¼ cup sugar
- 1 ½ cups warm milk (110°F)
- 1/3 cup unsalted butter (melted)
- 1 large egg
Directions
Activating the Yeast
To begin, dissolve the active dry yeast in the warm milk along with a teaspoon of sugar. Allow it to sit for about 5-10 minutes until it becomes frothy and bubbly. This step is crucial, as it ensures that your yeast is active and ready to help your dough rise.
Mixing the Dough
In a large mixing bowl, combine the flour, salt, and remaining sugar. Gradually add in the frothy yeast mixture, melted butter, and the beaten egg. Mix the ingredients until a shaggy dough forms. If needed, adjust with a little more flour or milk to achieve the right consistency. It should be soft but not too sticky to handle.
Kneading the Dough
Transfer the dough to a lightly floured surface and knead it for about 8-10 minutes. You’ll know the dough is ready when it is smooth and elastic. A good test is to stretch a small piece—it should hold its shape without tearing. Alternatively, you can use a stand mixer fitted with a dough hook for this process.
First Rise
Place the kneaded dough into a greased bowl, cover it with a clean cloth, and let it rise in a warm, draft-free place. Allow it to double in size, which typically takes about 1 to 1.5 hours. This rise is essential for developing the flavor and texture of your rolls.
Shaping the Rolls
Once the dough has risen, punch it down to release excess air. Divide the dough into equal portions, typically about 12-16 pieces. Roll each piece into a ball and place them in a greased baking dish, leaving some space between each roll for additional rising.
Second Rise
Cover the rolls again with a cloth and let them rise for another 30-45 minutes, or until they puff up and touch each other. This second rise helps achieve a light and airy texture in your rolls.
Baking the Rolls
Preheat your oven to 350°F (175°C). Bake the rolls for about 20-25 minutes, or until they are golden brown on top. Keep an eye on them towards the end to avoid over-baking. For a lovely finish, brush melted butter on top as soon as they come out of the oven for added flavor and shine.
Serving Suggestions
Serve the dinner rolls warm, accompanied by butter or garlic for spreading. They pair perfectly with soups, salads, and main dishes or can be enjoyed on their own as a delightful snack.
Additional Tips and Advice
To store leftover rolls, let them cool completely before placing them in an airtight container. They are best enjoyed fresh, but you can keep them at room temperature for 2-3 days. If you want to freeze your rolls, place them in a freezer-safe container or bag after they have cooled. They can last up to three months in the freezer. When ready to serve, simply thaw and warm them in the oven. Experimenting with herbs and spices, like rosemary or garlic powder, can also enhance the flavor profile of your rolls; feel free to get creative!
The Best Dinner Rolls - Kristine's Kitchen
Equipment
- 1 large mixing bowl
- 1 wooden spoon or spatula
- 1 measuring cups and spoons
- 1 stand mixer (optional)
- 1 clean kitchen towel or plastic wrap
- 1 baking sheet
- 1 parchment paper (optional)
- 1 oven
Ingredients
- 4 cups all-purpose flour
- 2 tablespoons sugar
- 2 teaspoons instant yeast
- 1 teaspoon salt
- 1 cup warm milk About 110°F/43°C.
- 1/4 cup unsalted butter, melted
- 1 large egg
- additional melted butter for brushing Optional.
Instructions
- In a large mixing bowl, combine the flour, sugar, instant yeast, and salt. Mix well.
- In a separate bowl, whisk together the warm milk, melted butter, and egg until well combined.
- Pour the liquid mixture into the dry ingredients and stir with a wooden spoon or spatula until a dough begins to form.
- If using a stand mixer, switch to the dough hook and knead the dough on medium speed for about 5-7 minutes, until smooth and elastic. If kneading by hand, turn the dough out onto a lightly floured surface and knead for about 10 minutes.
- Place the kneaded dough in a lightly greased bowl. Cover with a clean kitchen towel or plastic wrap, and let it rise in a warm place for about 1 hour, or until doubled in size.
- Once the dough has risen, punch it down to release air and turn it out onto a floured surface. Divide the dough into 12 equal pieces and shape each piece into a ball.
- Place the shaped rolls on a baking sheet lined with parchment paper or lightly greased. Leave some space between each roll.
- Cover the rolls again with a towel and let them rise for another 30-45 minutes, until puffy.
- Preheat the oven to 375°F (190°C).
- Once the rolls have risen, bake them in the preheated oven for 20-25 minutes, or until golden brown on top.
- If desired, brush the tops of the hot rolls with additional melted butter after removing them from the oven for extra flavor.