
Easy Garlic Cheese Bombs Recipe: Quick & Delicious Snack Idea
Garlic and cheese have long been beloved staples in the world of comfort food, tantalizing taste buds and warming hearts with their delightful combination. Whether it’s a rich cheese sauce, a garlicky bread, or a savory snack, these ingredients tend to bring a sense of indulgence and satisfaction to any table. It’s no wonder that dishes featuring garlic and cheese have gained immense popularity, captivating food lovers everywhere with their irresistible aroma and flavor.
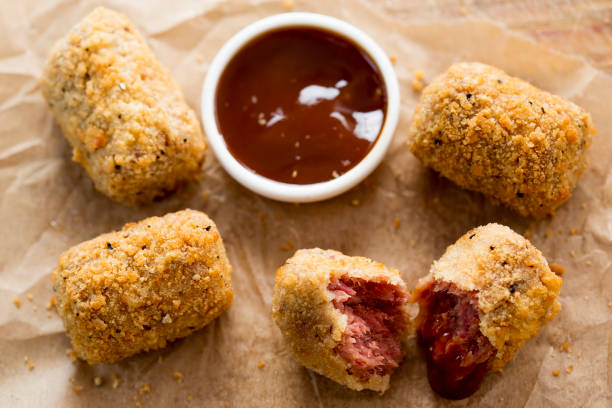
Among the myriad of cheesy delights, garlic cheese bombs stand out as a fun and delectable treat. These bite-sized wonders consist of fresh, pillowy biscuit dough enveloping a gooey, melted cheese center infused with the bold, aromatic flavor of garlic. Once baked, they transform into golden orbs that burst with flavor at the very first bite, making them an instant favorite for gatherings, movie nights, or simply indulging on a cozy evening at home.
This article aims to guide you through an easy and delicious recipe for making your very own garlic cheese bombs. We will explore the essential ingredients, provide a straightforward step-by-step recipe, and share tips that will help you create these delightful treats in no time. Whether you’re a seasoned chef or a novice in the kitchen, you’ll find that whipping up these cheesy delights is not only satisfying but also incredibly fun. Get ready to impress your family and friends with this scrumptious snack that is sure to become a staple in your comfort food repertoire!
What Are Garlic Cheese Bombs?
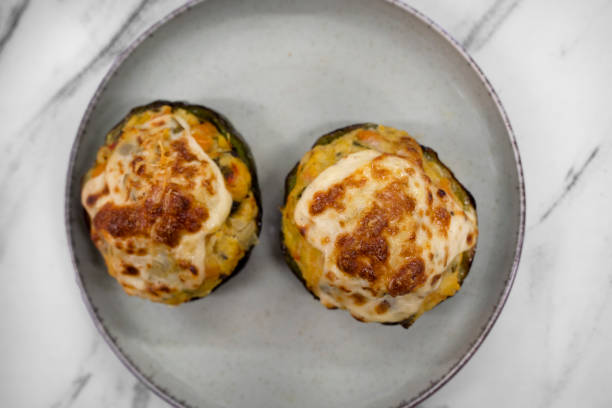
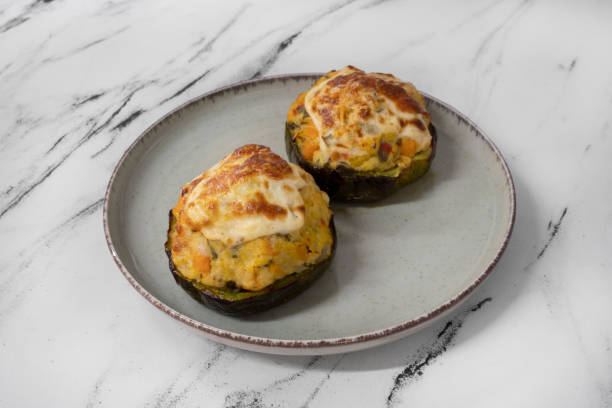
Garlic cheese bombs are delightful, bite-sized treats that combine the comforting taste of warm biscuit dough with a gooey, cheesy filling infused with aromatic garlic. Encased in soft, fluffy biscuit shells, they are perfect for anyone who craves that rich, indulgent flavor profile that garlic and cheese bring together. When baked, these fluffy spheres develop a golden crust and melt-in-your-mouth texture that makes each bite a wonderful experience filled with flavor.
The origin of garlic cheese bombs isn’t tied to a single culture but rather represents a delightful intersection of culinary traditions. Influenced by the love for cheesy bread and garlic knots found in Italian cuisine, these bombs have gained traction in various culinary scenes, particularly in the sphere of American comfort food. Celebrated in family gatherings, game days, and casual get-togethers, garlic cheese bombs embody the spirit of communal dining and joyful sharing, making them a popular choice for many occasions.
Why You Should Make Garlic Cheese Bombs
Garlic cheese bombs present an irresistible taste profile that merges creamy, cheesy, and garlicky goodness into a single, delectable bite. The combination of warm, gooey cheese and the aromatic essence of garlic creates a flavor explosion that is simply unforgettable. Each bomb delivers a comforting sensation perfect for satisfying cravings, making them a must-try for any cheese lover.
Additionally, their versatility makes garlic cheese bombs ideal for various occasions. Whether you’re hosting a party, enjoying a casual snack, or serving appetizers at a gathering, these delightful treats are sure to impress your guests. They can easily be tailored to match different themes or preferences, seamlessly fitting into any menu.
Another appealing aspect is the short preparation and cooking time needed to create these culinary delights. With just a few simple steps, you can have these cheesy bombs ready to serve in no time, allowing you to spend less time in the kitchen and more time enjoying with friends and family.
Ingredients for Easy Garlic Cheese Bombs
Here is a list of essential ingredients you will need to make your garlic cheese bombs:
- Refrigerated biscuit dough: This is the foundation of your garlic cheese bombs, providing the fluffy outer shell that encases the delicious filling.
- Cheddar cheese: A classic choice for its meltability and flavor, cheddar acts as the main filling, offering a rich cheese experience.
- Garlic powder or fresh garlic: The star ingredient that adds robust flavor. Fresh garlic gives a bolder taste, while garlic powder offers convenience.
- Butter: Used to brush over the tops of the baked bombs, enhancing the flavor and promoting a golden-brown finish.
- Optional ingredients: You can also experiment with herbs, spices, or different types of cheese such as mozzarella or cream cheese to customize the flavor profile.
Detailed Recipe for Easy Garlic Cheese Bombs
Step-by-step Directions
1. Preparation
Start by preheating your oven to 375°F (190°C). Gather all your ingredients and equipment, including a baking sheet lined with parchment paper and a mixing bowl.
2. Prep Biscuits
Open the refrigerated biscuit dough and separate it into individual biscuits. Cut each biscuit into smaller pieces, generally halving or quartering them, depending on your preferred size for the bombs.
3. Cheese Filling
In a mixing bowl, combine the cheddar cheese with garlic powder or minced fresh garlic. If desired, add any optional ingredients like herbs or spices to enhance the flavor. Mix well until all ingredients are evenly distributed.
4. Assemble the Bombs
To wrap the cheese filling, take a piece of the cut biscuit dough and flatten it slightly in your hand. Place a small spoonful of the cheese mixture in the center, then carefully fold the dough over the filling and pinch it to seal completely. Place each bomb seam-side down on the prepared baking sheet, ensuring they are spaced adequately apart to allow for expansion while baking.
5. Bake
Bake the garlic cheese bombs in the preheated oven for about 12-15 minutes, or until they are golden brown and cooked through. For added richness, you can brush melted butter over the tops of the bombs right before they finish baking. Consider sprinkling chopped herbs or additional garlic powder for an enticing finish.
Tips & Tricks
To ensure that your garlic cheese bombs are perfectly gooey, avoid overcooking them. Keep an eye on them in the oven, as the baking time can vary based on your oven type. Additionally, feel free to experiment with flavor combinations. Try adding a pinch of red pepper flakes for a spicy kick or some Italian herbs for a Mediterranean twist!
Common Variations of Garlic Cheese Bombs
Herbed Cheese Bombs
Add a combination of your favorite fresh herbs like parsley, thyme, or oregano into the cheese filling for a refreshing flavor twist. These herbed cheese bombs bring an aromatic quality that pairs beautifully with garlic.
Spicy Garlic Cheese Bombs
If you love heat, consider adding jalapeños or crushed red pepper flakes to the cheese filling. This variation creates a spicy kick that will tantalize adventurous taste buds.
Sweet Garlic Cheese Bombs
For a unique dessert twist, try incorporating a touch of cinnamon and brown sugar into your cheese filling. These sweet garlic cheese bombs are a delightful way to indulge your sweet tooth while enjoying the traditional flavors.
Storage and Reheating Instructions
To properly store leftover garlic cheese bombs, let them cool completely, then transfer them to an airtight container. You can refrigerate them for up to 3 days or freeze them for longer storage. When freezing, make sure to separate layers with parchment paper to prevent sticking.
For reheating, the oven is the best option to restore their crispness. Preheat the oven to 350°F (175°C) and bake the cheese bombs for about 10 minutes until heated through. Alternatively, you can use a microwave, but note that the texture may be less desirable.
Serving Suggestions
Garlic cheese bombs pair wonderfully with various dips and sides. Consider serving them alongside marinara sauce for dipping or a zesty garlic aioli. Also, pairing them with a refreshing salad or a chilled beverage can round out a delightful meal.
For gatherings, present the garlic cheese bombs on a colorful platter garnished with fresh herbs. This not only elevates their visual appeal but also encourages sharing and enjoying these delicious bites in a communal atmosphere.
FAQs
- Can I use a different type of cheese? Absolutely! Feel free to substitute cheddar cheese with mozzarella, pepper jack, or any cheese you prefer.
- How can I make these vegetarian-friendly? Simply omit any meat or animal-derived additives, and focus on the delicious cheese and garlic combination!
- What can I substitute for biscuit dough? If you prefer a homemade option, you can prepare your own biscuit dough or even use pizza dough as an alternative.
- Can I make these garlic cheese bombs ahead of time? Yes, you can assemble them in advance and refrigerate or freeze them before baking. Just adjust the baking time if they are cold from the fridge or freezer.
- What’s the best way to ensure they don’t stick to the pan? Line your baking sheet with parchment paper or lightly grease it before placing the bombs on it to prevent sticking.
Conclusion
Garlic cheese bombs are a delectable and comforting treat that combines the magical flavors of garlic and cheese into a fun, bite-sized snack. With this easy recipe, you’ll be able to delight your family and friends while enjoying the satisfaction of homemade comfort food!

Easy Garlic Cheese Bombs
Equipment
- 1 mixing bowl
- 1 baking sheet
- 1 parchment paper
- 1 pastry brush
- 1 measuring cups and spoons
- 1 oven
Ingredients
- 1 can refrigerated biscuit dough 16.3 oz can.
- 1 cup shredded mozzarella cheese
- 1/4 cup unsalted butter Melted (1/2 stick).
- 2 cloves garlic Minced.
- 1 teaspoon dried parsley
- 1/2 teaspoon salt
- 1/4 teaspoon black pepper
- optional grated Parmesan cheese For topping.
Instructions
- Preheat your oven to 375°F (190°C) and line a baking sheet with parchment paper.
- In a small bowl, combine the melted butter, minced garlic, parsley, salt, and black pepper. Set aside.
- Open the can of biscuit dough and separate the dough into 12 equal pieces.
- Flatten each biscuit piece slightly with your hands.
- Place about 1 tablespoon of shredded mozzarella cheese in the center of each flattened biscuit.
- Fold the edges of the biscuit dough over the cheese, pinching them together to seal the cheese inside.
- Roll the dough ball gently in your hands to shape it into a round ball.
- Place the cheese-filled balls on the prepared baking sheet, spaced about 2 inches apart.
- Brush the tops of the dough balls generously with the garlic butter mixture.
- If desired, sprinkle additional grated Parmesan cheese on top of each ball.
- Bake in the preheated oven for 12-15 minutes or until the tops are golden brown and the cheese is melted.
- Remove from the oven and allow to cool slightly before serving.